To install a washer correctly, place it on a level floor near water supply and drainage, remove shipping bolts, connect hot and cold inlet hoses, secure the drain hose, level the machine, and run a test cycle to check for leaks and vibration.
How to Install a Washer Correctly?
Washer installation may look simple, but incorrect setup can cause leaks, vibration, drainage issues, and long-term appliance damage. Most washing machine problems actually start during installation, not usage.
This guide explains practical washer installation tips for both front-load and top-load machines. It is designed to help you complete a safe, leak-free, and stable installation at home.
Why Proper Washer Installation Matters
Incorrect installation can lead to serious issues such as:
- Water leakage behind the machine
- Excess vibration and noise
- Drainage failure or water backup
- Error codes during operation
- Floor and wall damage
Proper setup ensures long-term performance and safety of your appliance.
Step 1: Prepare Installation Area
Before installing the washer, ensure the space is ready:
- Hard, flat, and stable floor
- Hot and cold water supply valves
- Proper drain (standpipe or sink connection)
- Grounded electrical outlet nearby
- Enough space behind the machine for hoses
Avoid placing the washer on carpet or uneven surfaces as this increases vibration.
Step 2: Remove Packaging and Shipping Bolts
Unpack the machine carefully and remove all packaging materials. Most importantly, remove shipping bolts (especially in front-load washers).
Shipping bolts protect the drum during transport. If not removed, they can cause:
- Loud noise during spinning
- Machine shaking violently
- Internal drum damage
Always keep shipping bolts for future relocation.
Step 3: Connect Water Inlet Hoses
Connect hot and cold water hoses correctly:
- Hot hose → hot water valve
- Cold hose → cold water valve
Before connecting, flush water through valves to remove dirt. Ensure rubber washers are installed inside hose connectors to prevent leaks.
Tighten connections gently, do not overtighten as it can damage fittings.
Step 4: Install Drain Hose Properly
Drain hose installation is critical for proper washing performance.
Key tips:
- Insert hose 3–5 inches into standpipe
- Do NOT seal drain tightly (air gap required)
- Avoid kinks or bends
- Secure hose with clamp or zip tie
Incorrect drain setup can cause siphoning, bad odors, or water backup.
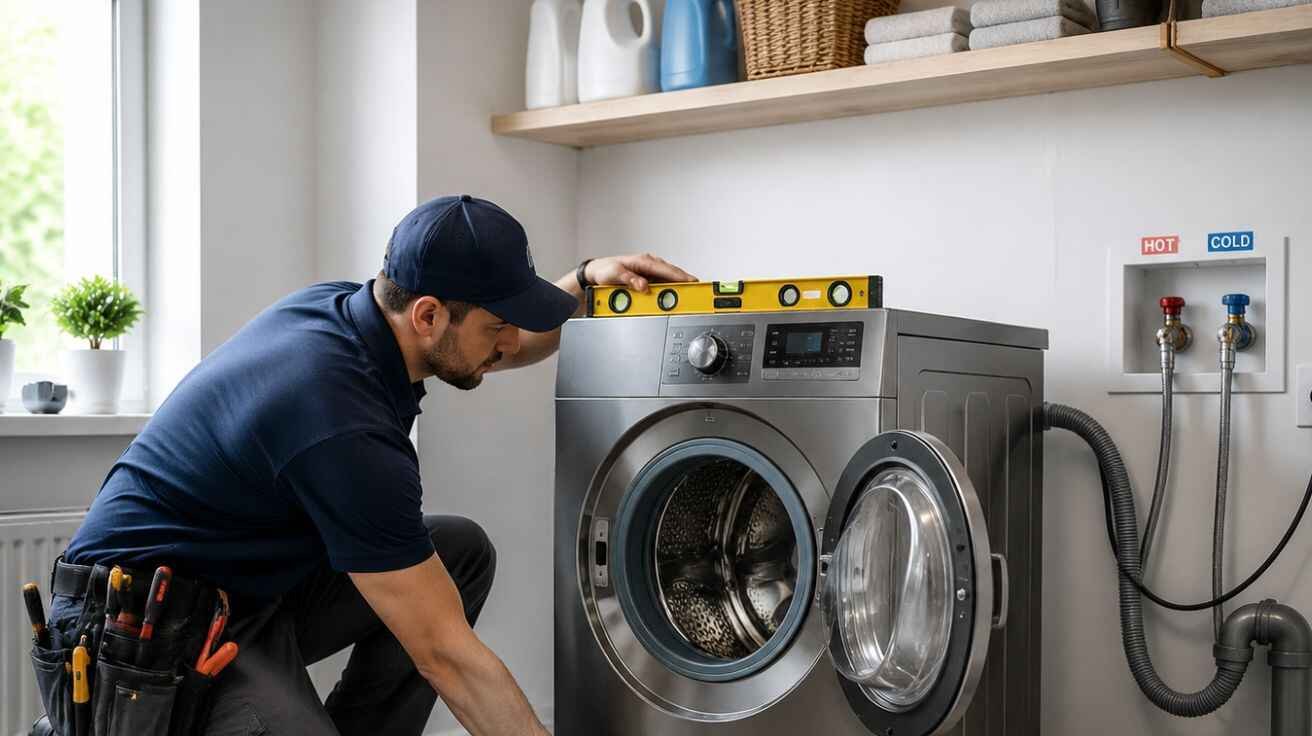
Step 5: Position and Level the Washer
Place the washer in its final position carefully, ensuring hoses are not crushed.
Then level the machine using adjustable feet:
- Check side-to-side level
- Check front-to-back level
- Ensure all four feet touch the ground
- Tighten locking nuts after adjustment
A properly leveled washer prevents vibration, walking, and noise during spin cycles.
Step 6: Connect Power Supply
Plug the washer into a grounded electrical outlet. Avoid using extension cords as washers require stable power supply.
Keep the power cord dry and away from water lines.
Step 7: Run a Test Cycle
Before washing clothes, run an empty cycle to check installation.
Check for:
- Water leaks at hose connections
- Proper filling and draining
- Stable spinning without shaking
- No error codes
This step ensures your washer is installed correctly.
Common Washer Installation Mistakes
Avoid these errors:
- Forgetting to remove shipping bolts
- Using old or damaged hoses
- Over-tightening water connections
- Incorrect drain hose placement
- Skipping leveling process
- Pushing washer too close to wall
Even small mistakes can lead to costly repairs later.
Front-Load Washer Installation Tips
Front-load washers require extra care:
- Always remove transport bolts
- Ensure perfect leveling
- Leave door slightly open after use
- Consider a drain pan in upper floors
These machines spin faster, so balance is critical.
Top-Load Washer Installation Tips
For top-load washers:
- Ensure enough space for lid opening
- Do not overload initial cycles
- Check tub balance during spin
Top-load machines are more forgiving but still require proper leveling.
Small Laundry Room Tips
If space is limited:
- Measure washer with hoses included
- Avoid tight wall placement
- Ensure access to valves
- Do not block filter access
Proper planning avoids future maintenance issues.
When to Call a Professional
Call an expert if:
- No water or drain connections exist
- Electrical outlet is not grounded
- Washer shakes even after leveling
- Plumbing modifications are needed
Fix Master Appliances provides reliable washer installation and repair services, ensuring safe setup, proper leveling, leak-free connections, and long-term appliance performance.
Final Checklist
Before using your washer:
- Shipping bolts removed
- Hoses properly connected
- Drain hose secured
- Machine leveled
- No leaks detected
- Test cycle completed
FAQs
1. Can I install a washer myself?
Yes, if plumbing and electrical connections already exist. Otherwise, professional help is recommended.
2. Why is my new washer shaking?
Common reasons include unremoved shipping bolts, unlevel floor, or improper load distribution.
3. How deep should the drain hose go?
Usually 3–5 inches into the standpipe without sealing it completely.
4. Do I need new hoses for installation?
Yes, new hoses are strongly recommended to prevent leaks and failures.
5. What is the biggest installation mistake?
Forgetting to remove shipping bolts is the most damaging and common mistake.
Conclusion
Washer installation is not just about connecting pipes. Proper setup ensures safety, performance, and long machine life. By following these washer installation tips removing shipping bolts, leveling correctly, securing hoses, and running a test cycle, you can avoid most common washing machine problems.
A careful installation today prevents expensive repairs tomorrow.
Leave a Reply